We're making it easier for you to use the Plan List View to see more plan items on your screen and customize columns to put plan item information in the order you want. Over the next few weeks we'll be rolling out the following enhancements to all customers:
- Reorder Columns: You can already select which columns to display for your plan. Now you can also change the order in which to show the columns.
-
Freeze Columns: Just like on your favorite spreadsheet tool, you can now freeze up to a selected column and then scroll left and right to see other columns that are off the screen.
-
Slimmed-Down Filter Bar: The area of the list view that shows what filters you've applied to the plan now takes up less screen real estate leaving room to display more of your plan items.
- Plan Item Action Menu: The action buttons that used to display when you hovered over a row (and also covered up some of the information about the plan item) have been moved into a dropdown menu at the end of each row.
When we enable these new features they will be available for all users on your AchieveIt account. Any customizations you already have in place, such as a set of columns that you've selected for a particular plan, will all still be there.
Here's a little more about each enhancement.
Reorder Columns
You've always been able to choose which plan item details to show by turning individual columns on and off in List View. Now you can also put those columns in the order that makes the most sense for each plan. Want to have the Assigned To, Members, and Admins for each plan item grouped together? It's as easy as opening the column editor and dragging the columns into the order you like.
First, click on the Column Layout button on the right side of the column header row.
You can then add new columns, remove existing columns, and reorder the columns as shown below.
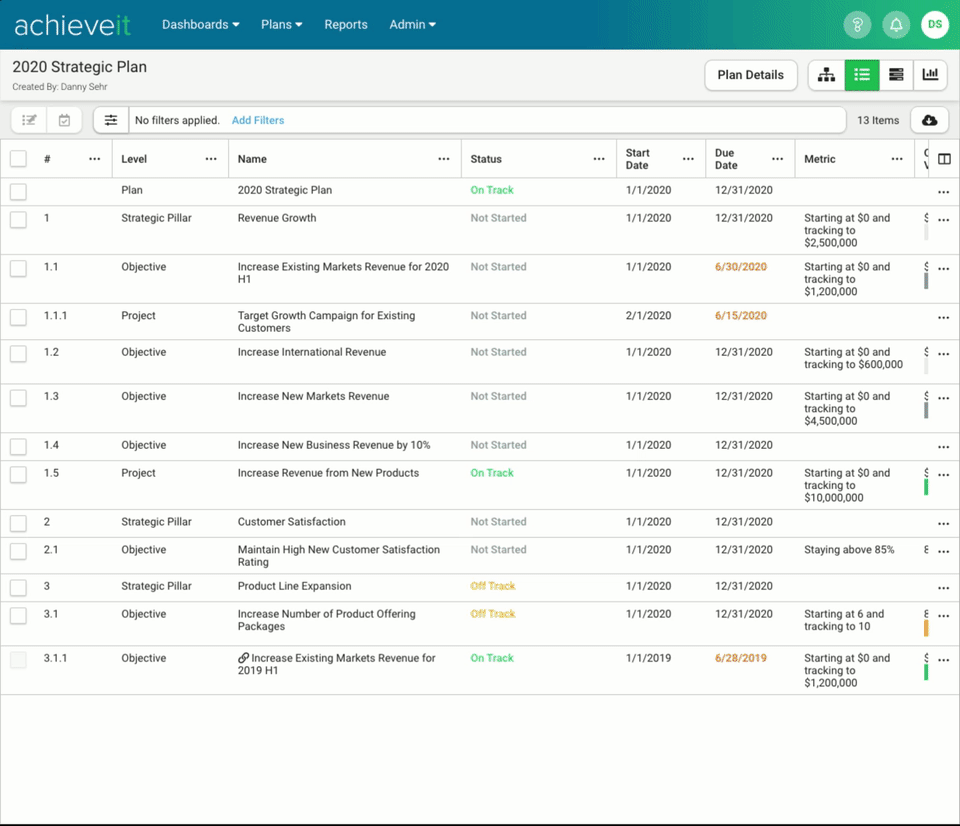
Once you click save, you'll instantly see all the columns in the order you just selected. If you export the plan to PDF or Excel you'll also see your new column layout.
Note that the columns that are visible and the order in which they are shown is your personal view. This means that:
- Only you will see the columns you've selected in the order that you've set.
- Those column selections are specific to each plan. If you want to have different columns displayed for different plans, you can do that.
- Other users who login and look at the same plan may see a completely different set of columns.
- If you schedule a List View report to be emailed out, the column layout you selected will be used in the PDF or Excel report that is attached to that email.
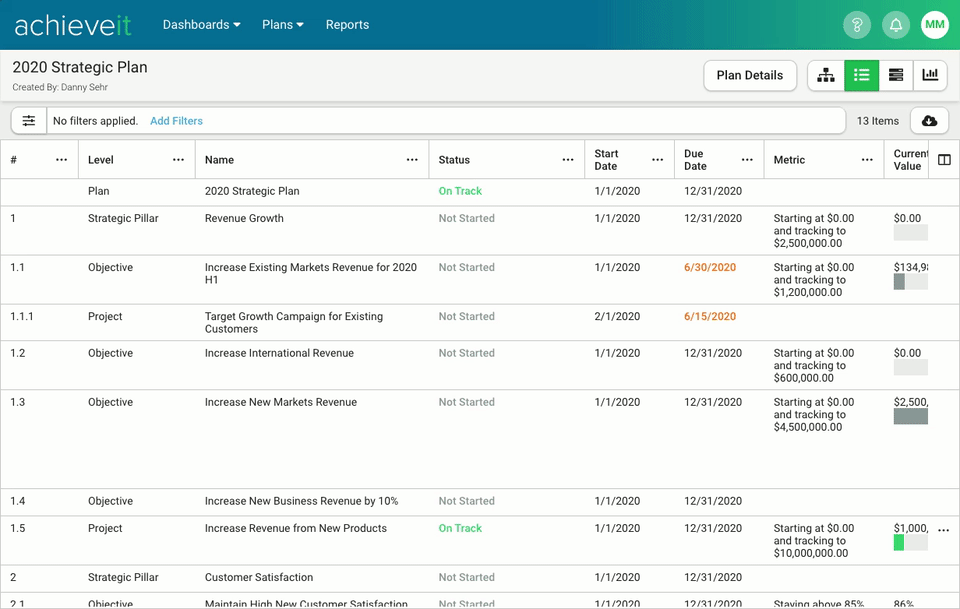
Freeze Columns
The other big change is that you can now freeze a set of columns in List View so that the details in those columns are always visible as you scroll left and right in the plan. This way if you have a lot of information you want to see you can lock a column like the plan item name and status in place so you can always see that key information.
Freezing columns is simple:
- Organize the columns you want to freeze in place as the leftmost columns in the List View.
- Click on the context menu (the "..." icon) on the column header
- Select the "Freeze Up to This Column" option.
- Then, as you scroll left and right, those columns will stay locked in place. The freeze point is saved so if you come back to the plan later those columns are still frozen.
It's also easy to unfreeze your columns:
- Click on the context menu on any column header. (It doesn't have to be the column that's frozen).
- Select the "Unfreeze Columns" option.
- The freeze is removed and you can now scroll the entire plan left and right.
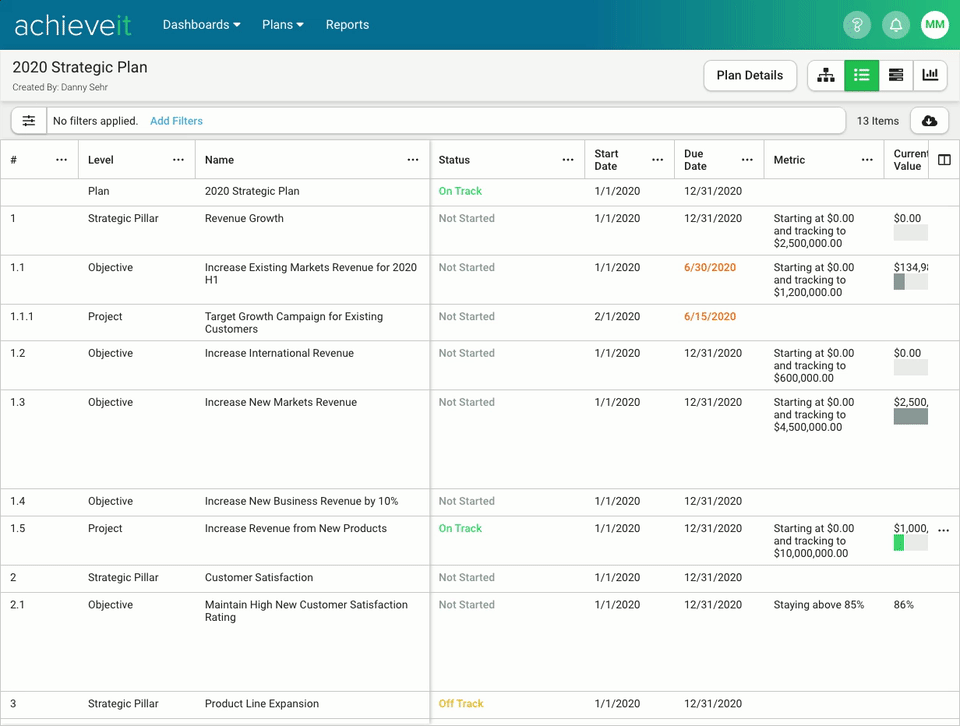
You can even reorder frozen columns and drag columns in and out of the frozen area. Click on the Column Layout button and give it a try.

As with Reorder Columns, only you will see your frozen columns. Since freezing columns is designed to help you view columns that are off your screen, the freeze state is not included in the PDF, Excel, and Word versions of the plan that you can export and that are included in scheduled reports.
Slimmed-Down Filter Bar
We've gotten a lot of feedback that you want to see more of your plan in your browser window at one time, so we looked at ways we could make more of the screen real estate available for plan item rows. One way we're doing that is by reducing the space taken up at the top of the List View by what used to be two separate bars: the filter bar and the action bar.
This is what it used to look like. The old filter bar would keep growing as you added more filters, and the action bar was mostly empty space with a few buttons at either end. This could take up a lot of space (at least 130 pixels).

Now the filters and actions are combined into a single, slimmer bar that is less than 40% of its previous height. Also, as you add more filters the height of the bar doesn't grow: if you want to see the full list, you just click to open the full filter list.

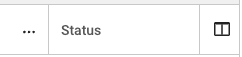
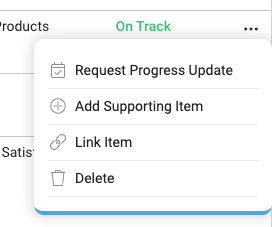
Plan Item Action Menu
There are a set of actions, like deleting a plan item or linking in a new plan item, that you can perform on each item from within List View. You used to access these actions through buttons that would display when your mouse hovered over each row:
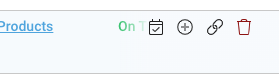
We found that this could lead to some frustration because these buttons would block some of the plan item information and also could be accidentally clicked as you scrolled through a plan.
We've moved all those actions under the context menu (the "..." icon) on the right side of each row. All of the same actions are available, but now they're out of your way while you're reading the plan and are just one click away if you need them.
Availability of These Features
We're rolling these features out to all customers over the next few weeks (starting the week of August 17, 2020). Once it's enabled on your organization's AchieveIt account your users will see an introductory walkthrough they first time they each visit the List View.
If you have any questions or would like to request accelerated access to these new features, contact your Customer Success Manager or send us a note to support@achieveit.com.